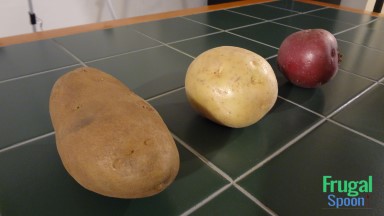
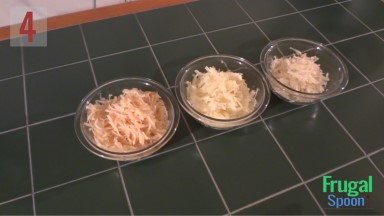
There are so many types of potatoes that can be used for hash browns. The most common potatoes are Russet, Yukon Gold, and Red Potato. My Plus 1 loves Red Potatoes since they are healthier.
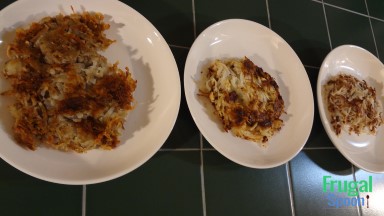
But which is best for hash browns? You pick your favorite and let me know. Fortunately, for us, they are all prepared the same. At the end of this recipe, there is a Youtube video link of my comparison of the three potatoes served as hash browns.
INGREDIENTS (Serves 1) 1 Red, Yukon White, or Russet Potato 2 Tbsp Salt 2 Tbsp Butter 2 Tbsp Vegetable Oil or Bacon Fat Salt and Ground Black Pepper to taste
How to make Hash Browns
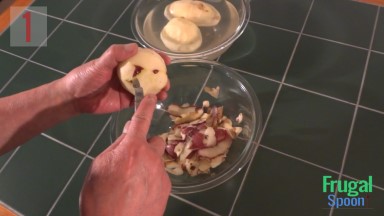
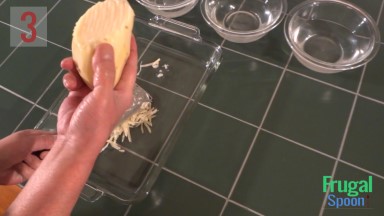
1. Have a bowl ready that is filled with cold water and 1/2 to 1 Tbsp salt depending on the size bowl you use. The bowl should be large enough for the potato and enough water to cover the potato. Peel the potato and remove any eyes (blemishes) and place it into the saltwater bowl.
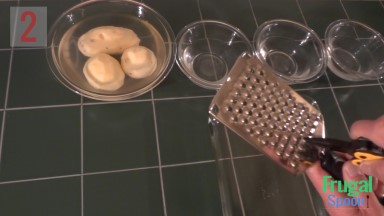
2. Use a grater to grate the potato with the largest grate size. Typical diner hash brown is grated with very large graters. The larger grate produces a thicker potato strand that is perfect for hash browns. You can create a larger grate with your grater by enlarging the cutting hole with needle-nose pliers. This is a nice tip from Alton Brown. Grab onto the cutting edge of the grate hole with the pliers and bend the cutting hole outward by 1mm (the thickness of your fingernail.) Repeat the process with all the cutting holes. You don’t need to bend the cutting hole very much to make a big difference in the grated potatoes.
3. Grate the potato at a 45° angle so you create long strands for beautiful hash browns, then return the grated potato into the bowl of salty water. The larger grate holes will create more resistance so rotate the potato so you are grating the sharpest edge on the potato. As you grate the potato it should take the shape of a carrot that is getting thinner. The grating can be scary so I wear dishwashing gloves for a level of safety. Also, wipe any excess potato off the grater for a smoother grating. If your grater has too much potato gunk on it then it will make grating harder and more prone to accidents.
4. Divide the meatball mixture into two bowls so they can be prepared separately. My Plus 1 likes onions, but she doesn’t like too much onion flavor. I love onions. Add the dried onions and garlic to each bowl based on your preference. Mix the ingredients and shape each batch into a ball. Cover each bowl with clear wrap and place them in the refrigerator for 20 minutes to an hour. This will allow all the flavors to meld together.
5. I am heating an 11 inch stainless steel frying pan to 300°F. A simple test is to heat your pan and sprinkle 1/4 tsp of water into the pan. If the water dances in the pan and evaporates between 9 to 11 seconds, then you are in the temperature range. If the water evaporates in 5 to 7 seconds, then the pan may be too hot. We will cook the potatoes slowly for 6-8 minutes, so the inside is tender, and the outside is golden brown. Add 1 Tbsp of butter to the pan to coat the entire bottom. The butter should melt in the pan gradually and not burn. Otherwise, wipe the burnt butter off and reduce the heat. Try adding the butter again after the pan cools slightly.
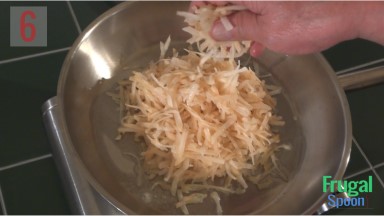
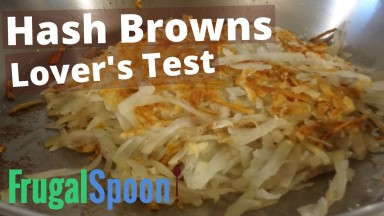
6. Add the potatoes to the pan in a pile. Add salt and pepper to your taste, then cover the potatoes with a lid for 3 minutes.
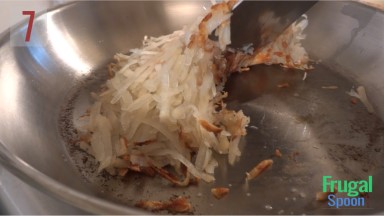
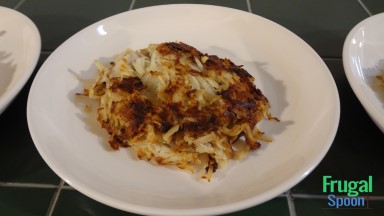
7. Remove the lid after 3 minutes. Use a metal spatula to peek under the potatoes. You are looking for a light browning to occur. Use a fork to taste the inside of the potato to check for tenderness. If the potato is tender and not browning enough, then you may want to increase the heat. If the potato is browned, then flip the potato, add 1 Tbsp butter, 1 Tbsp vegetable oil, or bacon fat and cook the second side without the lid. Check the second side for browning in 3 minutes. Notice how clean the pan remains during cooking. This is due to the low heat.
If your potatoes are not tender but the bottom is browning too much, then reduce the heat, flip the hash brown to its second side, add 1 Tbsp butter, 1 Tbsp vegetable oil, or bacon fat and replace the lid for 3 minutes. Check the second side for browning in 3 minutes. The hash brown is ready to serve once the second side has browned.
Tip#1. If you plan to cook several hash browns, then slightly under brown the potatoes on both sides. Place the cooked potatoes onto a non-stick baking sheet and keep the potatoes warm in an oven under very, very low heat. The low oven heat will continue to cook and brown the hash browns. You can quickly brown each hash brown as they are needed. I like mine very crispy, so it requires more frying out of the oven. My Plus 1 likes hers soft on the outside.
Tip#2. If you prefer an extra crisp hash brown, then cook the hash browns longer. Avoid raising the heat.
Tip#3. Allow your condiments to come to room temperature before serving with hash browns, just like the condiments at your table at the diner.
I am sure there are many more hash brown lover tips out there. Send me a line with your hash browns tip.
Thanks for stopping by. I hope you enjoy your own Hash Browns.